How to pull OFX bank statements for Nedbank | Entrepreneur SA
A number of our clients struggle to pull the OFX bank statements for accounting software, and we decided to compile a manual to assist with this.
Follow the steps below to assist you with this.
Don't forget to activate your gift pack for entrepreneurs here.
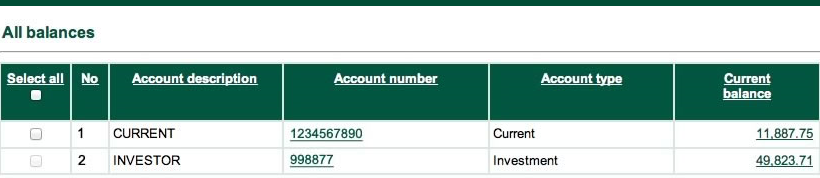
Step 1 - Log in to the bank and the main screen will appear.
Step 2 – To pull a statement.
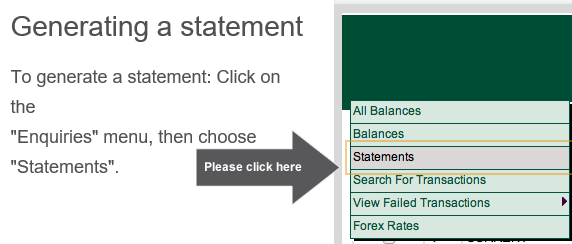
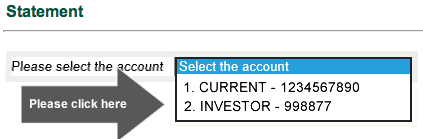
Step 3 - Click on the statements and select the account
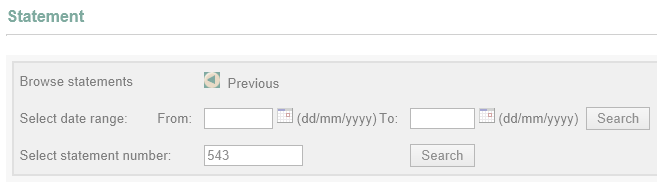
Step 4 – The statement screen will open and the following will appear.
Step 5 – In the select date range from using the calendar to the left of the block choose the start of the month the bank statement is needed from and the TO need until. (example 01/07/2018 TO 31/08/2018) and click the search botton.
Step 6 – Scroll down to the bottom of the statement page and on the bottom right you will see the following.
Step 7 – If you print the bank statement to give the the documents to your accountant click print.
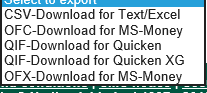
Step 8 – For the OFX download File, click on the drop-down arrow, and the following options will appear, select the option OFX- Download for MS-Money.
Step 9 – The following screen will appear below on your screen
Step 10 – Click on the save button on the down arrow, an option will open as save as.
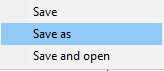
Step 11 – A screen
will open asking you where you want to
save the folder to, create a folder on your desktop called Bank statements and
save the file in there, this will make it easier to find to email.
Step 12 – You will then email your accountant the hard copy of the bank statement and the OFX file. Should you be printing the statements and adding to the documentation for your accountant to collect, you need to send them the OFX file only.
NB – At all times your accountant needs the hard copy of the bank statement to ensure that the bank reconciles and for record purposes and the OFX file to import into the bank manager of the accounting software.